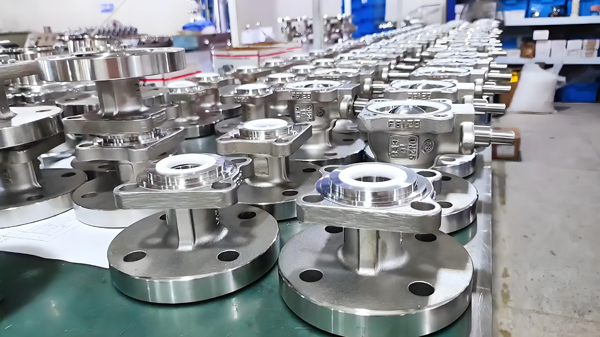
Ball valves are essential components in a variety of industrial applications, providing reliable flow control in pipelines. Among the different types of ball valves, electric ball valves and pneumatic ball valves are particularly popular due to their automation capabilities. In this article, we will explore how a 4-inch ball valve is manufactured, focusing on materials, design considerations, and the differences between manual, electric, and pneumatic ball valves.
Understanding Ball Valves
Before diving into the construction of a 4 inch ball valve, it is vital to understand what a ball valve is and how it works. A ball valve consists of a spherical disc (ball) that controls the flow of fluid. When the valve is open, the ball rotates to allow fluid to pass through; when the valve is closed, the ball blocks the flow of fluid. This simple yet effective mechanism makes ball valves a popular choice in a variety of applications, including water supply, gas distribution, and chemical processing.
Ball valve type
- Manual ball valve: This is the most basic type, where the user turns the handle to open or close the valve. It is suitable for applications where flow control is not often performed.
- Electric Ball Valve: This type is equipped with an electric actuator for remote operation. The electric ball valve is ideal for automation systems that require precise control.
- Pneumatic ball valve: Similar to electric ball valves, pneumatic ball valves utilize air pressure to operate. They are often used in applications that require fast start-up and are often found in process control systems.
Materials Required for a 4 inch Ball Valve
To construct a 4-inch ball valve, you will need the following materials:
- Ball: Typically made of stainless steel, brass, or PVC, depending on the application and fluid type.
- Body: The valve body can be made of cast iron, stainless steel or plastic to provide strength and durability.
- Valve Seats: These are usually made of PTFE (Teflon) or other elastomers to ensure a tight seal.
- Stem: The valve stem connects the ball to the actuator or handle and is usually made of stainless steel.
- Actuator: Depending on whether you are building an electric or pneumatic ball valve, you will need a suitable actuator.
- Gaskets and O-Rings: These are critical to preventing leaks and ensuring a proper seal.
Step-by-step guide to making a 4-inch ball valve
Step 1: Design the valve
Before you begin construction, make a detailed design of your ball valve. This should include size, material, and the type of actuator you plan to use. For a 4-inch ball valve, make sure the ball and body sizes are proportional for smooth operation.
Step 2: Make the body
Make the valve body from the material of your choice. This usually involves machining the body to size, making sure the inlet and outlet ports are aligned correctly. If you use metal, welding may be required to connect the different parts.
Step 3: Create the ball
The ball is the heart of the valve. It should be perfectly spherical to ensure a tight seal when closed. Use a lathe to machine the ball from the material of your choice. Pay attention to the surface finish, as a smooth surface will reduce wear and improve sealing.
Step 4: Install the seat
Once the valve body and ball are ready, install the seats inside the valve body. These seats should be positioned to fit the ball tightly, allowing it to rotate freely while maintaining a tight seal when closed. Use washers or O-rings to enhance the sealing ability.
Step 5: Assemble the valve stem and actuator
Insert the stem into the top of the valve body and attach it to the ball. Make sure the stem is securely attached to the ball so it rotates smoothly. If you are building an electric or pneumatic ball valve, follow the manufacturer’s instructions for attaching the actuator to the stem.
Step 6: Test the Valve
Before placing a valve into service, it must be thoroughly tested. Check for leaks by pressurizing the valve and checking all joints and seals. Operate the valve to ensure it opens and closes smoothly without any obstruction.
Step 7: Final Adjustments
After testing, make any necessary adjustments to ensure optimal performance. This may include tightening bolts, adjusting actuators, or replacing seals if leaks are detected.
in conclusion
Building a 4 inch ball valve requires careful planning, precise machining, and a good understanding of the components involved. Whether you choose to build a manual, electric, or pneumatic ball valve, the principles are the same. By following the steps outlined in this guide, you can create a reliable ball valve that meets your specific needs. Remember that safety is of the utmost importance, so always adhere to industry standards and best practices during the construction and testing phases. With the right approach, your custom ball valve can be used effectively in a variety of applications, ensuring efficient flow control for years to come.
Post time: Feb-13-2025


